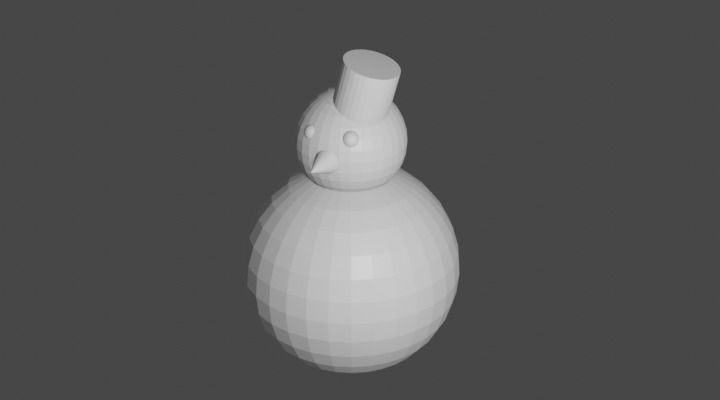
Snowman
Watch the video or,
Follow the step by step instructions below.
Follow the steps to create a snowman. Try the challenge at the bottom of this tutorial.
Viewport shading
Enable the Rendered mode in Viewport Shading in the upper-right corner.

Adding a UV Sphere
To create the shape of the snowman we’ll be using a UV Sphere. First the cube needs to be removed.
Select the cube.
Remove the cube by pressing X and selecting OK.
To add a UV Sphere, you can use the Add tab from the upper menubar.

Go to Add -> Mesh -> UV Sphere to add a UV Sphere.
Now you have a UV Sphere for the body of the snowman. Let’s add another UV Sphere.
Go to Add -> Mesh -> UV Sphere to add another UV Sphere.
The UV Sphere was added at the same place as the previous UV Sphere. So let’s move the UV Sphere and put it on top.
Select the Move tool from the left menu.

Drag the blue arrow and move the UV Sphere on top of the other.
Now we have a body and a head with the same size. Let’s make the body bigger.
Scaling
Select the bottom UV Sphere.
Press S to scale and move your mouse to make the sphere bigger.
Adding a nose
For the nose we’ll use a cone. Let’s add a cone.
Go to Add -> Mesh -> Cone.
The cone is inside the bottom sphere. Again use the blue arrow to pull up the cone.
Put the cone on the head.
To create the nose, we need to make the cone smaller and we need to rotate it. Let’s first rotate the nose.
Select the Rotate tool from the left menu.

You will see 3 arcs, a red, a green and a blue arc. These arcs allow you to rotate in X, Y or Z direction. You can grab an arc and drag it along that axis.

Use the red, green or blue arcs to rotate the cone.
Move the cone in front of the snowman. Use the Move tool.
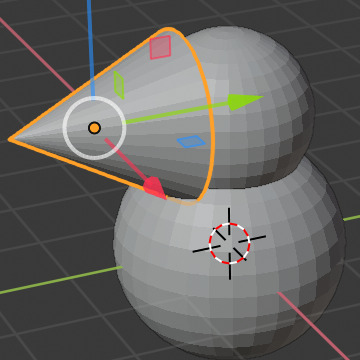
If the cone is in the right location in the right direction, you can make the nose smaller.
Press S to scale. Shrink down the nose.
Using the arrows, you can move the nose.
Adding a hat
Let’s add a hat to the snowman. We’re going to use a cylinder for the hat.
Go to Add -> Mesh -> Cylinder.
Move the hat on top of the head using the arrows.
Shrink it down using S for scale.
Using the Rotate tool to slightly rotate the hat.
Go back to the Move tool and use the arrows to properly position the hat on top of the snowman’s head.
A snowman
Challenge
Add a pair of eyes and some buttons to the snowman.