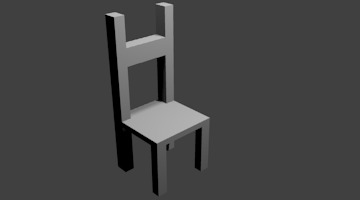
Chair
Watch the video or,
Follow the step by step instructions below.
Viewport shading
Enable the Rendered mode in Viewport Shading in the upper-right corner.

Struts for the back of the chair
We are going to use the cube to create the struts of a chair.
Scale the cube making it much thinner like a strut on the back of a chair.
You can use shortcuts S+X to scale along the x-axis, S+Y to scale along the y-axis and S+Z to scale along the z-axis.
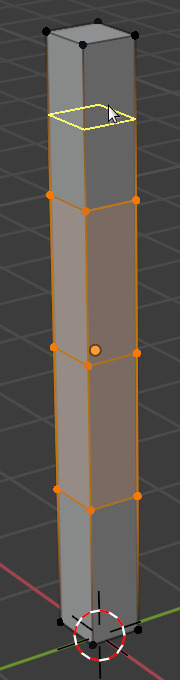
Now we need to create some cuts.
Go to Edit mode.
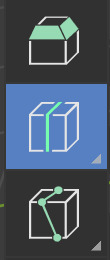
Select the Loop Cut tool from the menu left.
Move the mouse towards the cube.
You will notice that you can chop the cube.
Chop the cube in half by clicking with the left mouse button.

If you move your mouse you can create more cuts. You can also use the Loop Cut and Slide menu in the bottom left corner.
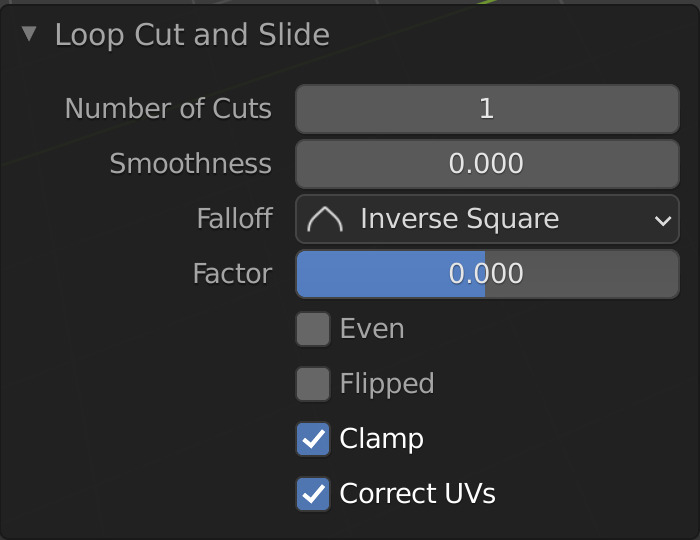
Set the Number of Cuts to 3.
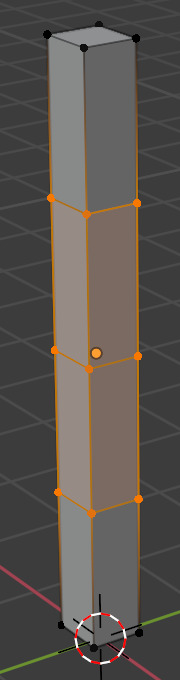
Create another cut at the top. If you click and keep the mouse pressed you can move the cut by moving the mouse.
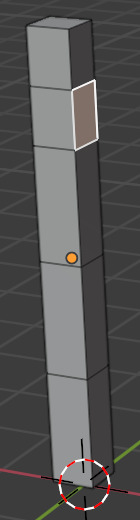
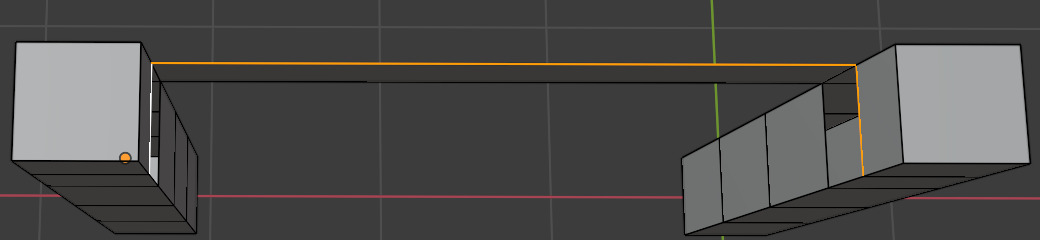
Now we can create another strut by copying.
Go to Object mode.
Copy and Paste the strut using CTRL+C and CTRL+V.
And join the two struts. Select both struts by holding down SHIFT, then press CTRL+J to join.
The two struts are joined together and are part of the same object.
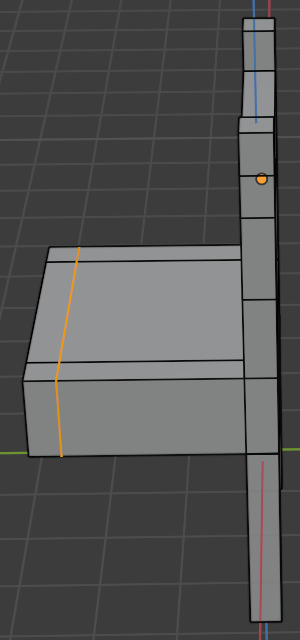
The back of the chair
To create the back of the chair we need to connect the faces of the 2 struts.
Go to Edit mode.
Go to Face select.

Select the Select box tool.

Select the face on top.
Press X to delete. Select Faces from the Delete menu.
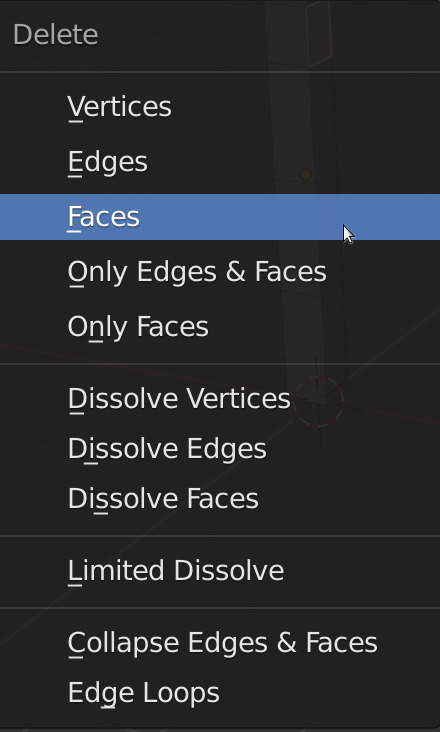
Do the same for the other strut. Delete the face on top.
Now we need to join the 2 empty spaces.
Go to Edge select.

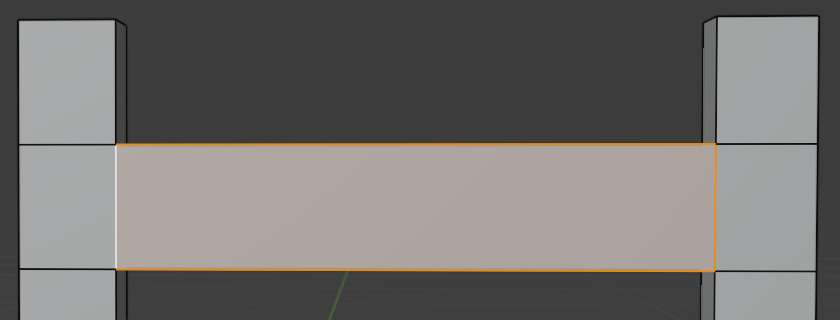
Select an edge of the empty space.
Select the same edge in the opposite strut.
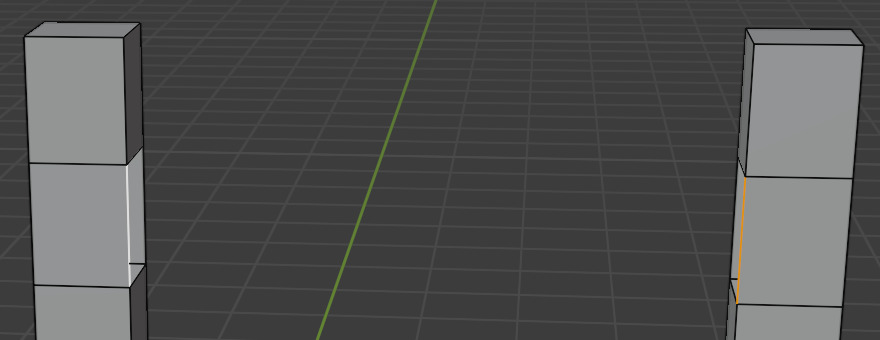
Press F and a face is added.
Add another face on top. Now you have to select 3 edges.
And then add a face by pressing F.

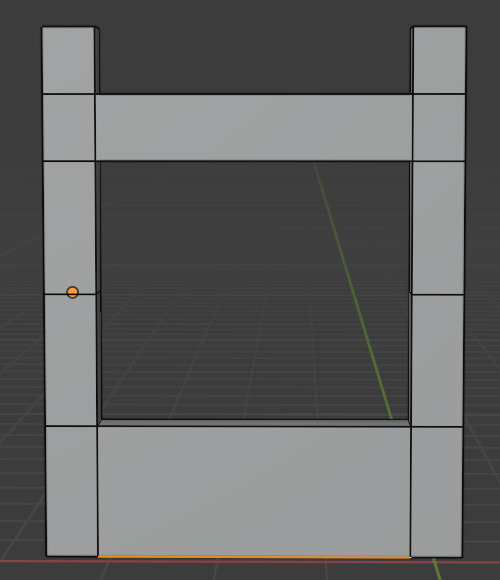
In the same way add 2 more faces creating a backrest.
Create another backrest at the bottom.
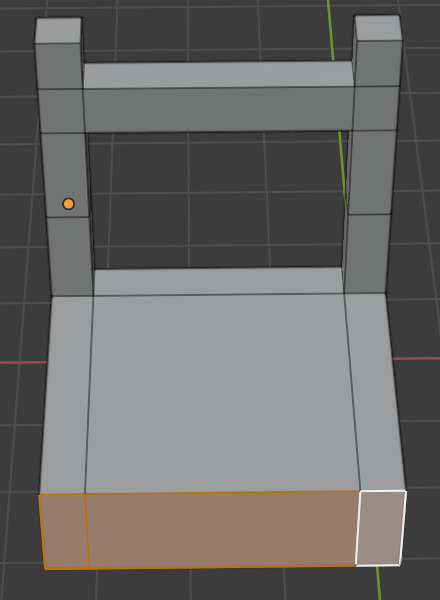
The seat
We can create the seat by extruding 3 faces at the front.
Go to Face select.
Select the 3 faces at the bottom front.
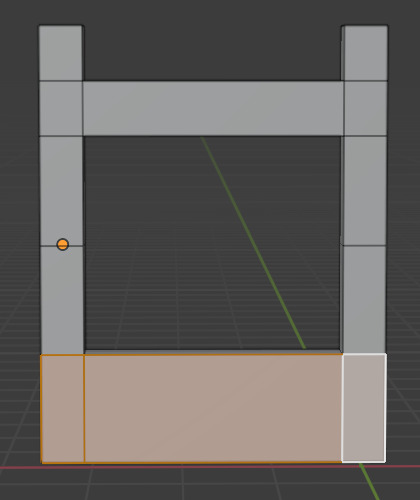
Press E to Extrude and pull out the 3 faces.
The legs
To create the legs at the back we can extrude 2 faces underneath.
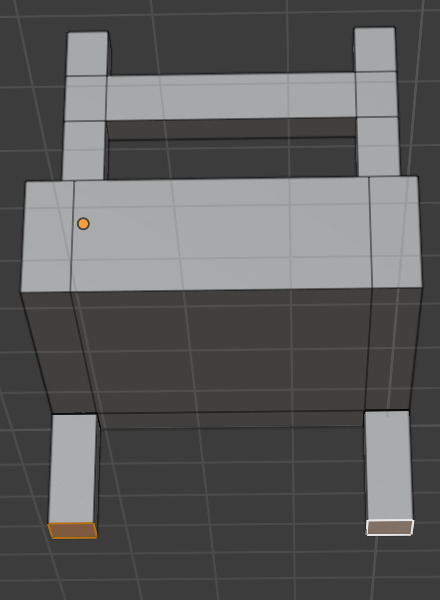
To create the legs at the front we need to create a cut.
Select the Loop Cut tool.
Create a cut in the front of the seat. Click and keep the mouse pressed. Then move the cut to the front.
Select the Select box tool.
Go to Face select.
Select the 2 faces for the front legs.
Press E to Extrude.
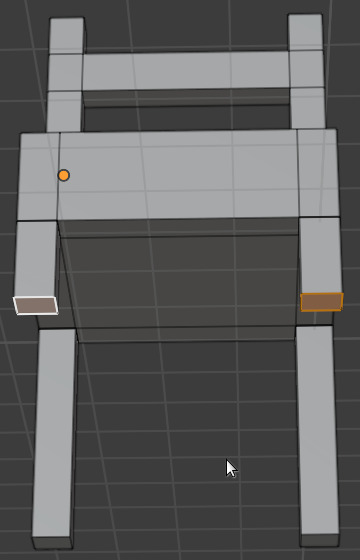
How does chair look like?